November 9, 2018 - TCO
Prevention series: Knee exercises for strength and stability
Unfortunately, knee injuries are all too common. If you’ve experienced a knee injury or know someone who has, you’ve seen how it can affect everyday life.
Knee pain can limit you from participating in your favorite sports or activities and, in some cases, affect walking and climbing stairs. Although some injuries are difficult to avoid – slipping on the sneaky Minnesota ice or crashing on those snowy ski hills – TCO wants to provide you with ways to help take care of those knees.
Three things to think about for protecting your knees:
- Flexibility: Stiffness in the joints above and below the knees (hips and ankles) will increase stress to the knees and contribute to poor mechanics with squats, running and jumping. Be sure to get into a good stretching program.
- Thigh strength: Weakness in the quadriceps and hamstring muscles will increase the load on the knee joint with stairs, squats and running. Those muscles help support the knee joint, so keep them strong!
- Core stability: Poor core stability will drive poor mechanics with squatting, running and cutting. Signs that you may have some weakness here: your knee caves inward with squats/lunges or jumps; your pelvis drops and/or your trunk tilts over your standing leg with any single-leg activity, or your knees tend to drive too far over toes with squatting. This all can contribute to increased stress on the knees.
Below are some thigh-strengthening and core-stabilization exercises to help better support the knees.
Thigh strength
Straight leg raise
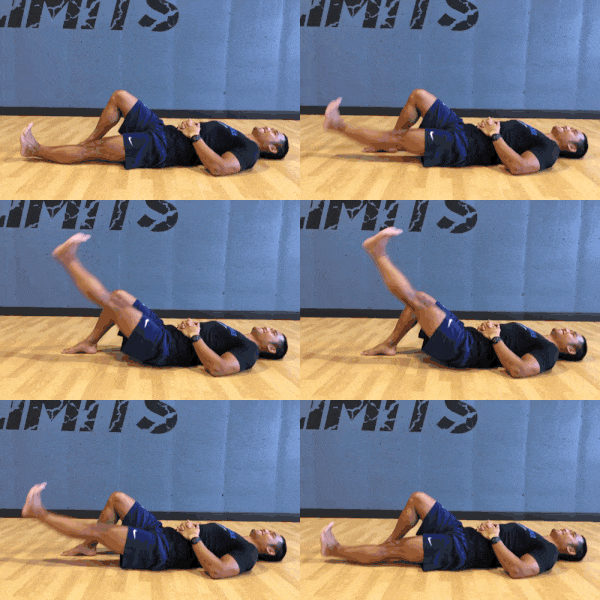
- Lie on your back with one knee comfortably bent and the other knee straight.
- Contract your quadriceps (front thigh) of your straight leg.
- Raise this leg a comfortable distance toward the ceiling and slowly lower. Make sure to keep the knee straight and the quadriceps (front thigh) muscle engaged during the entire lift.
- You can also try these leg lifts with the leg turned outward slightly. You should feel the inner quadriceps muscle working more in this position.
- Start with 10-15 reps, gradually work up to 30 reps.
Squat to chair
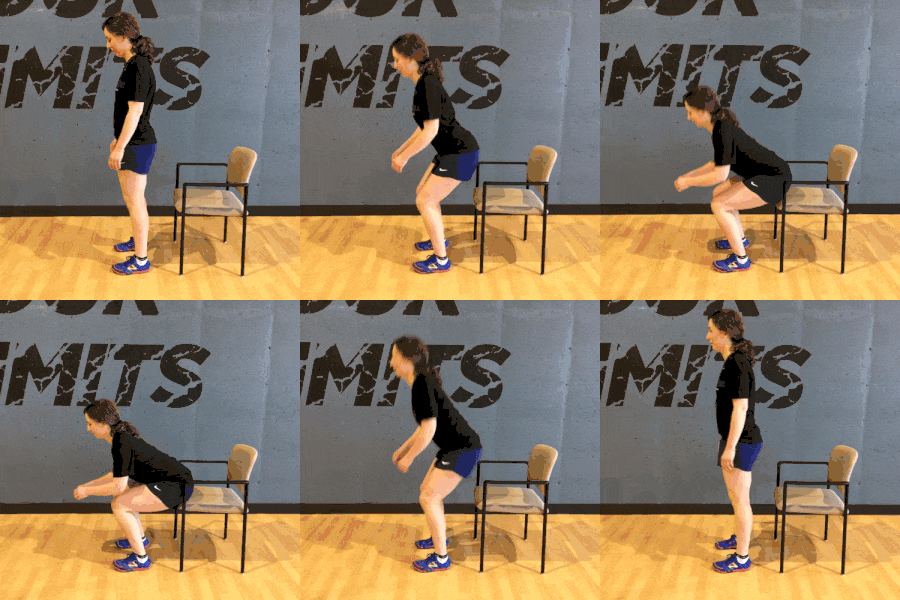
- Leading with your hips and buttocks, slowly bend your knees as if attempting to sit in the chair. Do not sit down, but use the chair to help promote good squatting mechanics. This helps prevent you from driving your knees too far over your toes, which can increase stress in the knees.
- Press through your heels and tighten your buttock muscles as you push back up to stand. Do not let your knees cave inward while lowering down or while returning to stand. Do not push through pain with this exercise. If there is any pain, try adding a cushion to the chair to decrease the depth of the squat.
- Start with 10 reps, increase to 2 or 3 sets of 10 reps as able.
Lateral stepdown
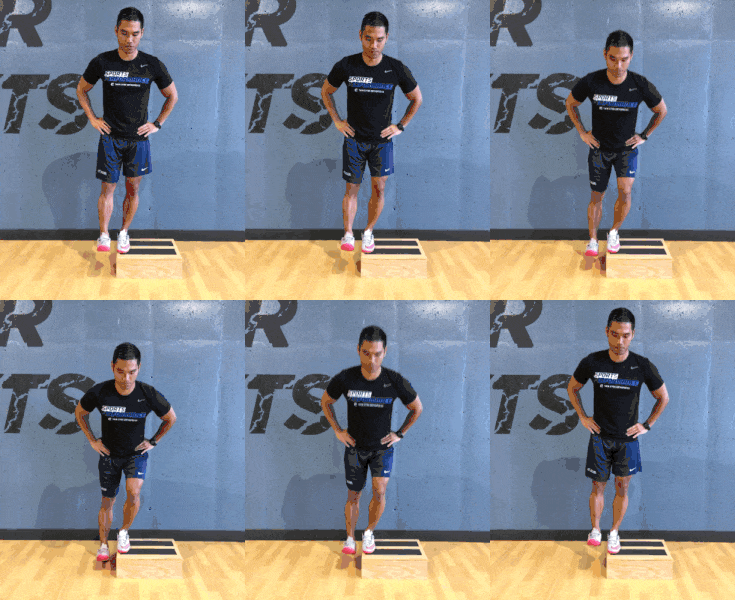
- While maintaining an upright posture, slowly bend the knee of the leg on the step.
- Lower down until your opposite heel lightly taps the floor. Keep your hips level. Do not let your hip drop down as you tap the floor – only lower down as far as you can while keeping the pelvis level. Also, do not let the weight-bearing knee cave inward – keep it in line with your third and fourth toes. Like with the chair squats, do not push through pain; try decreasing the height of the step.
- Start with 10 reps, increase to 2 or 3 sets of 10 reps as able.
This is the most advanced of the three strengthening exercises. If you have any pain, start with the pain-free exercises and gradually work into this as symptoms allow.
Core strength/stability
Side-lying hip abduction
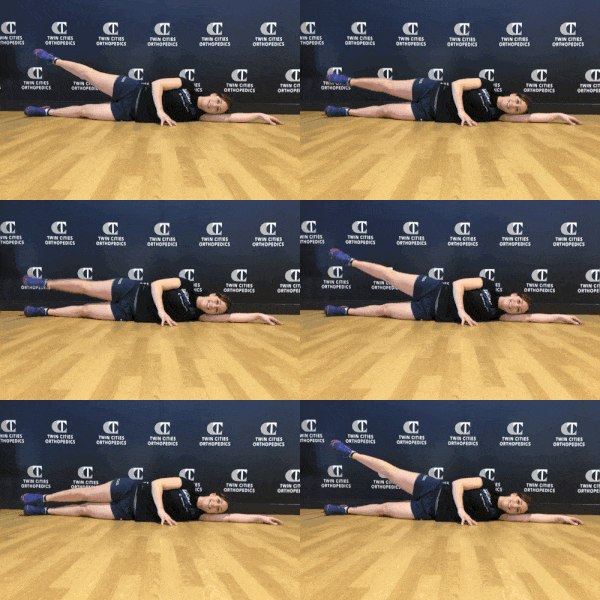
- Lie on your side with both legs straight.
- Slowly raise your top leg up towards the ceiling. Keep your toes pointing straight ahead. Do not let your hips/pelvis roll back. Oftentimes, your body will try to recruit your front hip muscles or your low back muscles, but we want to work your outer hip/buttock muscles.
- You can also brace your abdominal muscles to help protect your low back. Hold for a brief moment and then slowly lower back down.
- Start with 10-15 reps, gradually work up to 30 reps as able.
Side bridge
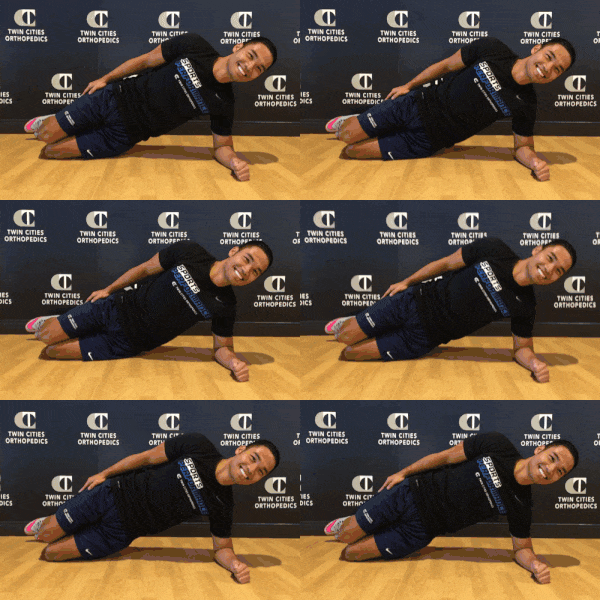
- Lie on your side with your knees flexed 90 degrees.
- Contract your abdominals and buttock muscles.
- Raise your trunk up into a side-bridge position by supporting your trunk with your elbow and knee. Do not allow your elbow to be above shoulder height. Keep your abdominals and buttock muscles engaged while you hold this position.
- Start with 3 sets of 15-20 seconds, gradually work up to 1-minute holds as able.
Bridge march
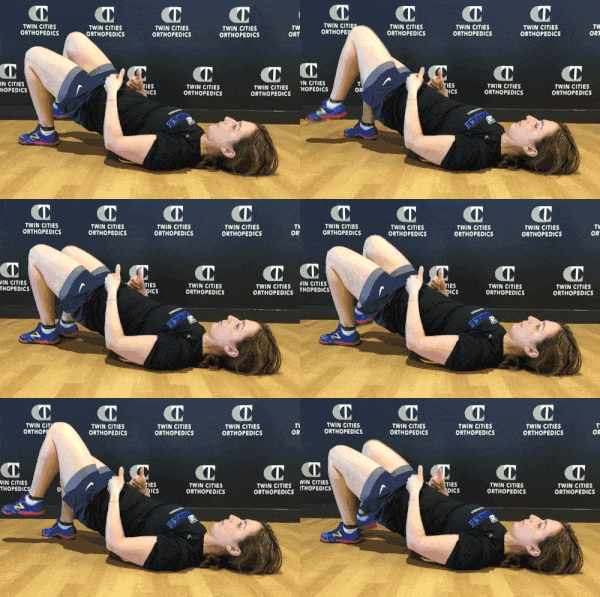
- Lie on your back with your knees bent and feet flat on the floor.
- Engage your abdominal muscles and as you slowly lift your buttocks up, squeeze your buttock muscles together. Pause in this static bridge position to ensure your pelvis is level.
- While keeping your pelvis level, lift one foot off the floor and slowly lower your foot back down to the floor. Alternate lifting one foot and then the other – again make sure your pelvis stays level during the entire exercise. You should feel your outer hip/buttock muscle engage on the weight-bearing leg – these muscles will help keep the pelvis from dropping.
- Perform the alternating march for 20 seconds, 3 sets – gradually work up to 1 minute as able.
If you’re unable to keep the pelvis level while performing this exercise, start with the other stabilization exercises and gradually work back into this exercise.
Whether you’re exercising to prevent or recover from an injury, remember there’s no one-size-fits-all exercise for individuals or specific conditions. If you experience pain or discomfort, stop immediately and consult your trusted health care provider.

